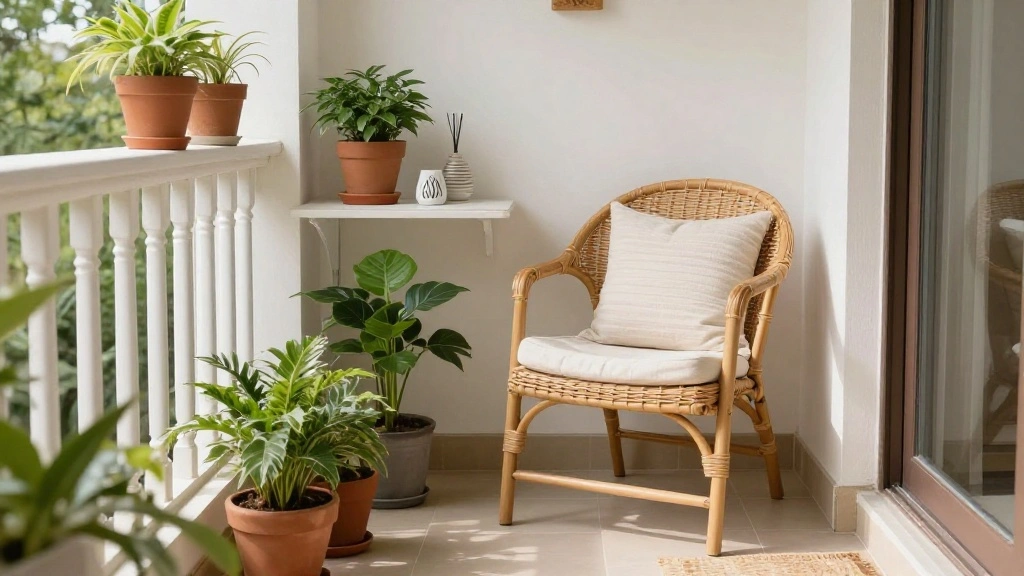
Living in a small apartment often means sacrificing outdoor space, but it doesn’t have to mean sacrificing your love for nature. A minimalist balcony garden can transform your tiny outdoor space into a relaxing oasis, allowing you to enjoy fresh air and greenery without taking up too much room. The challenge is that many people feel overwhelmed by the idea of gardening, especially in limited spaces. This guide helps you overcome that hurdle.
By following these simple steps, you will create a stunning balcony garden that not only enhances your apartment’s aesthetic but also provides a calming retreat. You will learn how to choose the right plants, select functional containers, and maintain your garden easily. Whether you’re a busy professional or a student, this guide is tailored for you.
This project has a beginner difficulty level and an estimated time commitment of 2-3 hours. You’ll be amazed at what you can accomplish in just a few hours! Let’s get started on creating your perfect balcony retreat.
TL;DR Summary
- Choose the right location and conditions for your balcony garden.
- Select low-maintenance plants suitable for your space.
- Use minimalist and functional containers for planting.
- Maintain your garden with simple care routines.
TL;DR Summary
Editor’s Choice

EWPJDK 4 Pack Garden Pruning Shears, Stainless Steel Garden Shears, Gard…

Nantucket 24-Inch Self Watering Tall Planter, 2-Pack, Weather-Resistant …
Prerequisites/Materials Needed
- Containers: 3-5 pots (various sizes, preferably lightweight)
- Soil: 1 bag of potting soil
- Plants: 2-3 low-maintenance plants (e.g., herbs, succulents, or small flowers)
- Watering can: 1 (or a small spray bottle)
- Gardening tools: Optional (small trowel, gloves)
Prerequisites/Materials Needed
Editor’s Choice

Creative Co-Op 26-Ounce Snail Shaped Stoneware Watering Can, Multicolor
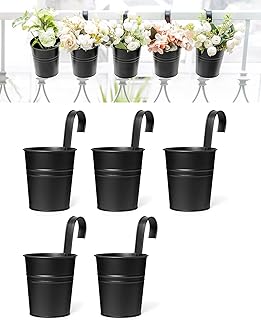
Dahey 5 Pcs Hanging Flower Pots 4 Inches Metal Iron Bucket Outdoor Plant…

Burpee, 9 Quarts | Premium Organic Potting Natural Soil Mix Food Ideal f…
Skill Level & Time Estimate
Skill Level: beginner
Total time estimate: 2-3 hours
Skill Level & Time Estimate
Editor’s Choice

Ogrmar 36 Pockets Vertical Wall Garden Planter Plant Grow Bag for Flower…

Lechuza 15680 Balconera Color 80 Self-Watering Planter for Indoor and Ou…

48x24x30.7in Wood Raised Garden Bed with Legs Elevated Planter Box Garde…
Step 1: Choose the Right Location

Start by selecting the best spot on your balcony for your garden. Here’s how to do it:
- Look for a place that gets sufficient sunlight, ideally 4-6 hours a day.
- Ensure the area is sheltered from strong winds that could damage your plants.
- Consider accessibility for watering and maintaining the plants.
Pro Tip: If you have limited sunlight, consider using a grow light to supplement natural light.
Why this matters: The right location is crucial for plant health and growth. Without adequate light, your plants may not thrive.
Time estimate: 15-20 minutes.
Step 2: Select Your Plants
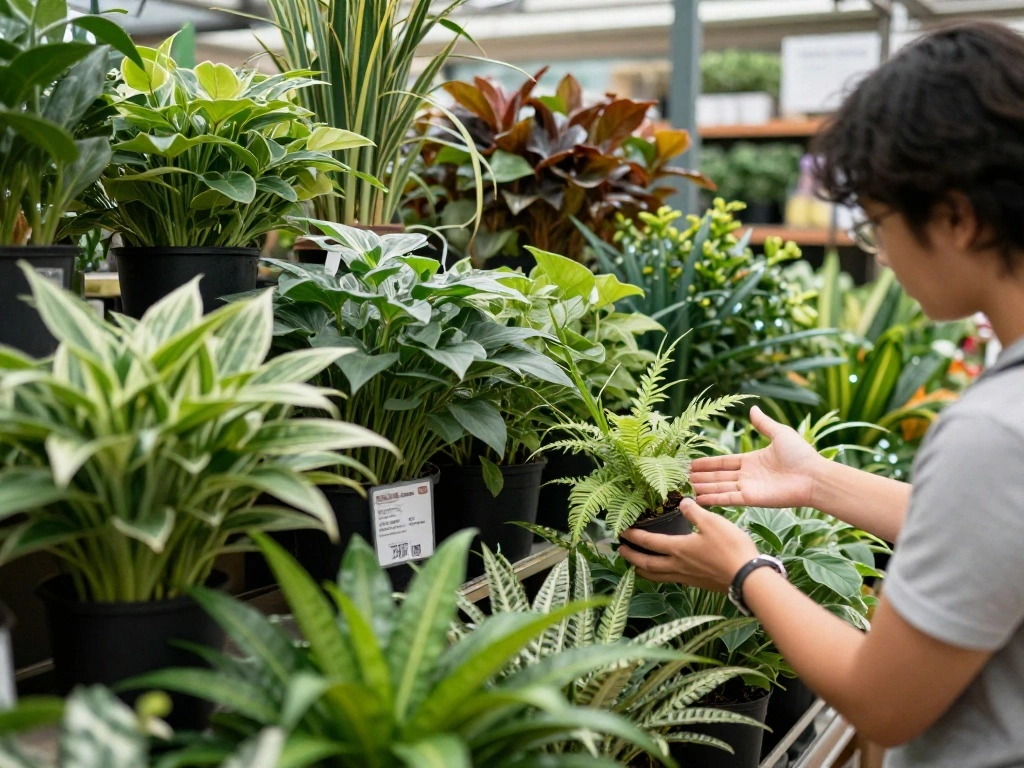
Choosing the right plants is essential for a successful balcony garden. Follow these steps:
- Research low-maintenance plants that thrive in your climate.
- Select plants based on your balcony’s light conditions (e.g., herbs for sunlight, succulents for drought).
- Consider plant size; avoid large plants that require more space.
Warning: Avoid plants that are invasive or too large for your containers as they can take over your space.
Why this matters: The right plants will grow well in your specific conditions, minimizing your maintenance efforts.
Time estimate: 30-45 minutes.
Step 2: Select Your Plants
Editor’s Choice

Ahopegarden Indoor Garden Hydroponics Growing System: 10 Pods Plant Germ…

YNNICO Indoor Self Watering Planters with Drainage Holes and Saucers, 8,…

Coitak Artificial Succulent Plants Potted, Assorted Decorative Faux Succ…
Step 3: Choose Your Containers
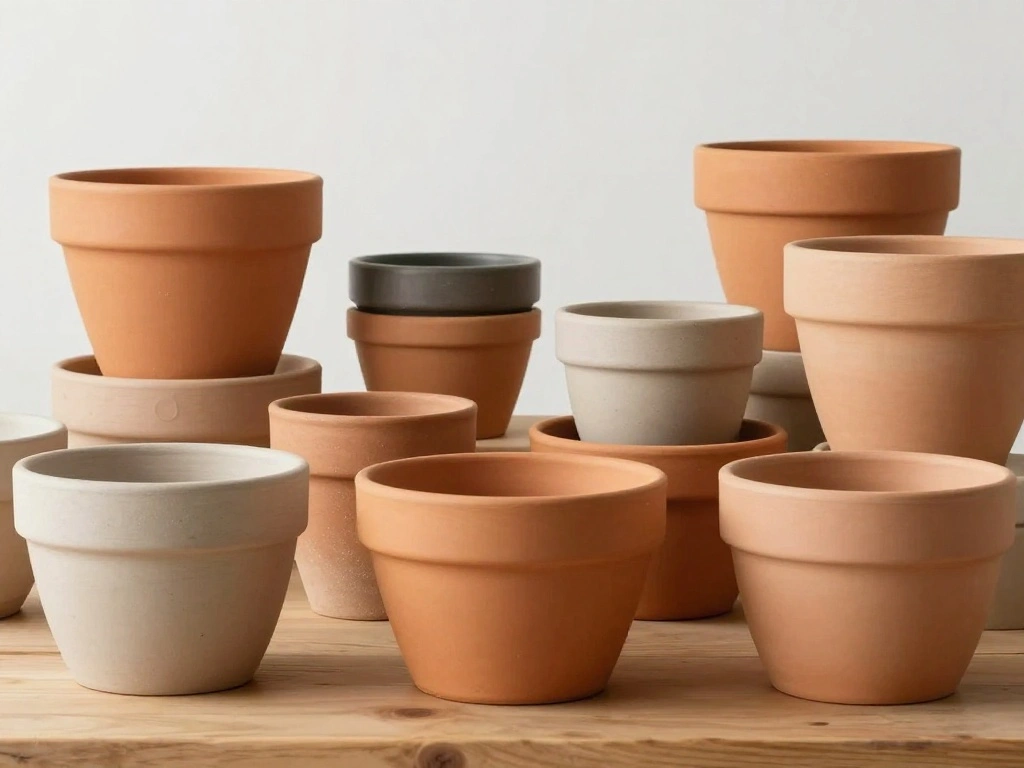
Containers play a significant role in your balcony garden’s aesthetics and functionality. Here’s how to choose:
- Select lightweight pots that are easy to move.
- Ensure containers have drainage holes to prevent waterlogging.
- Consider using minimalist designs that complement your balcony decor.
Pro Tip: Use vertical planters to save space and create an eye-catching display.
Why this matters: Proper containers help with drainage and plant health while also enhancing the visual appeal of your garden.
Time estimate: 20-30 minutes.
Step 3: Choose Your Containers
Editor’s Choice

FUIJOL 4/5/6/7 Inch Clear Nursery Pots for Plants with Sacuers 20 Pack, …

Hydroponics Growing System,30 Pods Hydroponic Tower,Space-Saving 5-Layer…
Step 4: Prepare the Soil
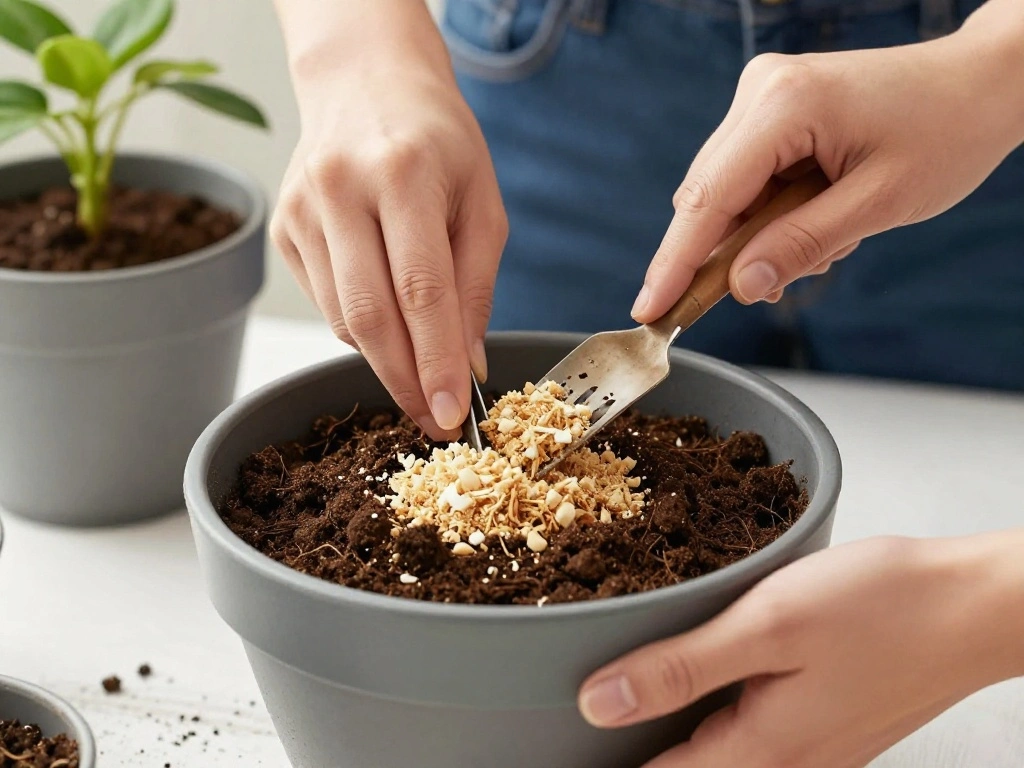
Good soil is essential for healthy plants. Here’s how to prepare it:
- Fill each container with potting soil, leaving about an inch from the top.
- Mix in some organic matter, like compost or worm castings, for added nutrients.
- Water the soil lightly to help it settle before planting.
Warning: Avoid using garden soil, as it can become compacted and may harbor pests.
Why this matters: Proper soil preparation provides the nutrients your plants need to grow and thrive.
Time estimate: 20-30 minutes.
Step 4: Prepare the Soil
Editor’s Choice

Fiskars Indoor Watering Can, Long Reach Spout for Precision Hydration on…

Urban Worm Company Worm Castings – 4 Quart/4.8lbs
Step 5: Plant Your Selection

Now, it’s time to plant your chosen greenery. Follow these steps:
- Make a small hole in the soil for each plant, ensuring it’s deep enough for the root ball.
- Gently remove the plant from its original container, taking care not to damage the roots.
- Place the plant in the hole and cover the roots with soil, lightly pressing down.
Pro Tip: Space plants according to their growth needs; overcrowding can lead to competition for resources.
Why this matters: Proper planting techniques ensure healthy root development and growth.
Time estimate: 30-45 minutes.
Step 5: Plant Your Selection
Editor’s Choice

Miracle-Gro Indoor Potting Mix, Blended for a Variety of Houseplants, Fe…

Small Garden Tools – 3 Pcs Mini Garden Tools Set with Small Trowel, Mini…
Step 6: Water Your Plants
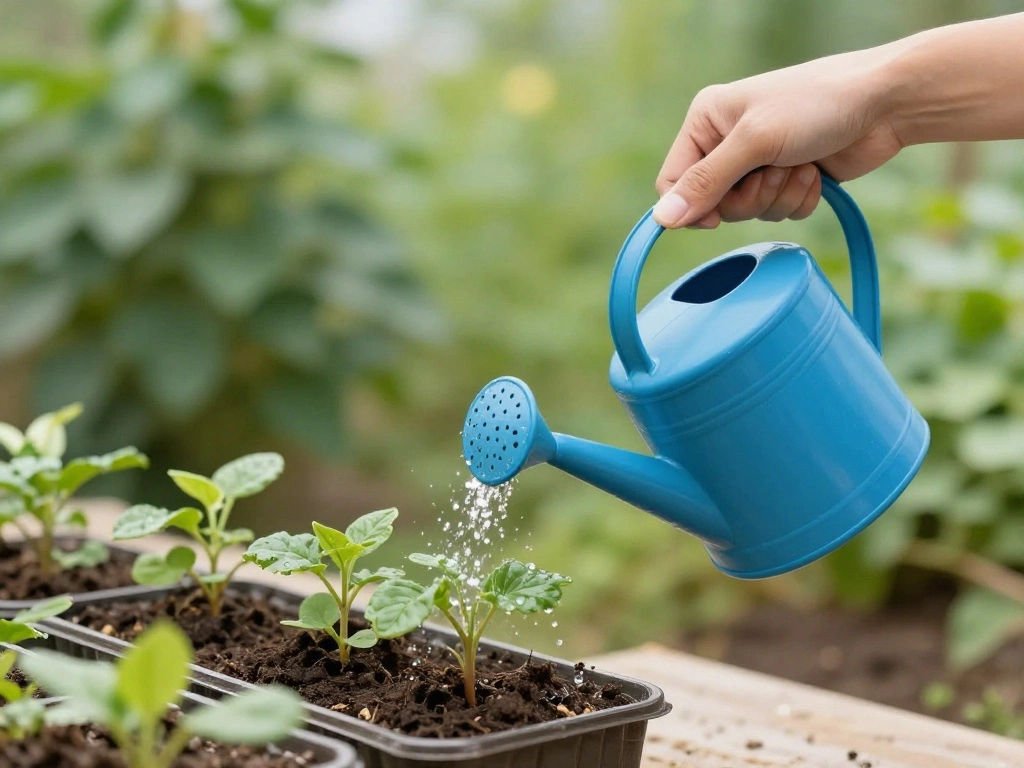
After planting, watering is essential for establishing your garden. Here’s how to do it:
- Water your plants thoroughly until water drains from the bottom of the pots.
- Check soil moisture levels every few days; adjust watering based on weather conditions.
- Avoid overwatering, which can lead to root rot.
Warning: Be careful not to let your plants sit in standing water.
Why this matters: Proper watering is critical for plant health; both under and overwatering can harm your plants.
Time estimate: 15-20 minutes.
Step 6: Water Your Plants
Editor’s Choice

8/10/12 Inch Self Watering Pots for Indoor/Outdoor Plants – Large Plasti…

Klein Tools ET140 Pinless Moisture Meter for Non-Destructive Moisture De…
Step 7: Add Decorative Elements
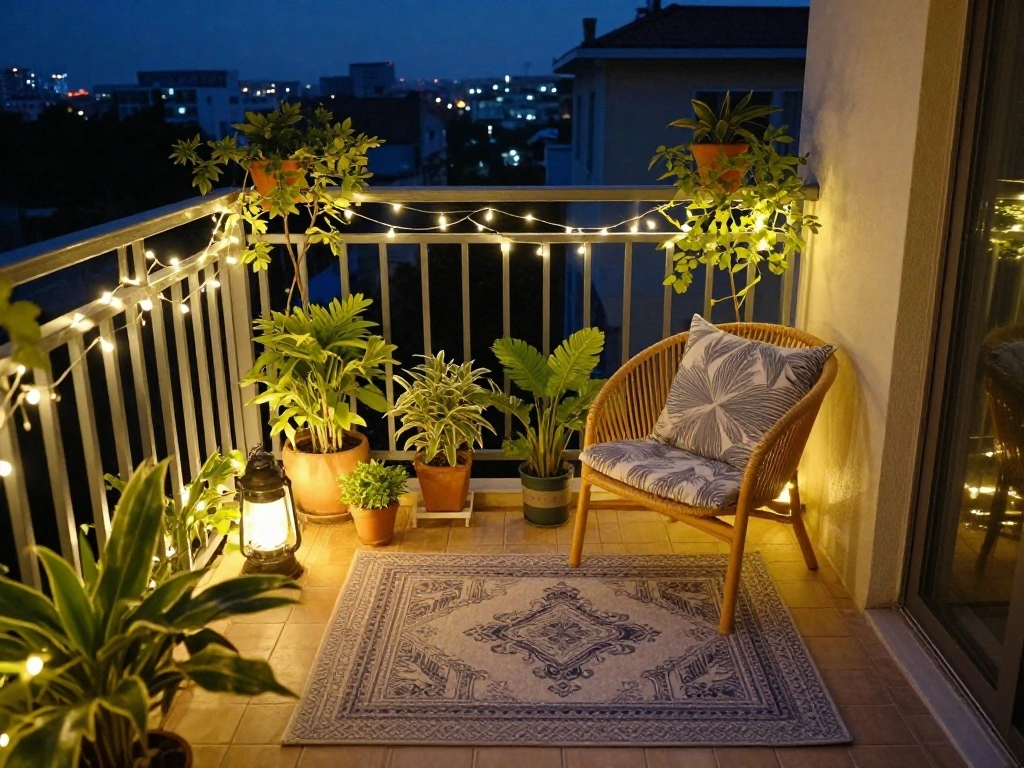
Enhance your balcony garden with decorative elements to create a cozy atmosphere. Follow these steps:
- Add decorative stones or mulch on top of the soil for aesthetics and moisture retention.
- Consider adding a small outdoor rug or fairy lights for ambiance.
- Arrange your pots creatively for visual interest.
Pro Tip: Use plants with varying heights to add dimension to your garden.
Why this matters: Decorative elements can make your garden feel more inviting and personalized.
Time estimate: 30-45 minutes.
Step 7: Add Decorative Elements
Editor’s Choice

Brightown 12 Pack LED Fairy Lights Battery Operated String Lights – 7ft …

SAFAVIEH Washable Rug Outdoor Courtyard Collection – 2′ x 3’7″, Navy & B…

FANTIAN 20 lbs Large River Rocks for Outdoor Landscaping, 3-4 Inch Decor…
Step 8: Maintain Your Garden

Regular maintenance ensures a thriving balcony garden. Here’s how to maintain it:
- Check your plants weekly for pests and remove any dead leaves.
- Fertilize your plants every month with a balanced fertilizer.
- Water consistently, adjusting based on the season.
Pro Tip: Keep a gardening journal to track plant health and watering schedules.
Why this matters: Consistent care helps prevent issues and promotes healthy growth.
Time estimate: 15-30 minutes weekly.
Step 8: Maintain Your Garden
Editor’s Choice

Natural Organic Fertilizer – Recreational Indoor Rare Gardens and Farm…

Bonide Captain Jack’s Neem Oil, 32 oz Ready-to-Use Spray, Multi-Purpose …

Step 9: Enjoy Your Garden

Finally, take time to relax and enjoy your new balcony garden. Here’s how:
- Set up a comfortable seating area where you can unwind.
- Consider adding a small table for drinks or snacks.
- Invite friends over to share your garden experience.
Pro Tip: Use your garden as a space for mindfulness practices like meditation or reading.
Why this matters: Your garden is not just for plants; it’s a space for relaxation and enjoyment.
Time estimate: Ongoing.
Step 9: Enjoy Your Garden
Editor’s Choice

addlon 100FT Outdoor String Lights G40 with Remote, 54 LED Shatterproof …

HOOBRO Bar Table, Height-Adjustable Round Pub Table 27-35.4 Inches with …
Coleman Portable Camping Chair with 4-Can Cooler, Cushioned Seat & Back …
Pro Tips
- Plan for Seasonality: Rotate plants according to the seasons for continuous blooms and harvests.
- Use Companion Planting: Plant herbs and flowers together to naturally deter pests.
- Small Tools Matter: Invest in small, high-quality tools for better control in tight spaces.
- Stay Hydrated: Don’t forget to care for yourself while caring for your plants!
- Educate Yourself: Regularly read gardening blogs or watch videos to enhance your skills.
Pro Tips
Editor’s Choice

5Pcs Succulent Tools,Mini Garden Tools,Pruning Scissors as Plant Accesso…

Seed Needs Herb Seeds Variety Pack Culinary Herb Collection (12 Individu…
8/10/12 Inch Self Watering Pots for Indoor/Outdoor Plants – Large Plasti…
Common Mistakes to Avoid
Warning: Avoid overcrowding your pots; this can lead to poor growth and increased pest problems. Always follow spacing guidelines for each plant.
Warning: Don’t use old garden soil; always opt for fresh potting mix to prevent pests.
Warning: Be cautious with watering; too much can drown your plants, while too little can cause them to wilt. Always check soil moisture before watering.
Common Mistakes to Avoid
Editor’s Choice

XLUX Long Probe Deep Use Soil Moisture Meter, Water Monitor Indicator Se…

Miracle-Gro Indoor Potting Mix for All Plants, Use with Houseplants and …
12″ 10″ 9″ 8″ Self Watering Pots with Water Level Indicator, Large Plast…
Troubleshooting Section
Problem: Plants are wilting.
Solution: Check for underwatering and adjust your watering schedule. Ensure pots have proper drainage.
Problem: Leaves are yellowing.
Solution: This could indicate overwatering or nutrient deficiency. Assess watering habits and consider fertilizing.
Problem: Pests are present.
Solution: Remove pests manually or use insecticidal soap. Ensure plants have good air circulation.
Troubleshooting Section
Editor’s Choice

Bonide Insecticidal Soap, 32 oz Ready-to-Use Spray Multi-Purpose Insect …

Miracle-Gro Indoor Plant Food for All Plants, Liquid Plant Food for Hous…

UNIWA Soil Moisture Meter, Plant Moisture Meter, Soil Hygrometer Sensor …
Variations/Alternative Methods
Consider these alternative methods for your balcony garden:
- Hydroponics: Use a soil-less growing system for an innovative approach, especially if space is very tight.
- Vertical Gardening: Use wall-mounted planters to maximize space and create a stunning visual display.
- Container Gardening: Utilize various containers for a mobile garden that you can easily rearrange as needed.
Variations/Alternative Methods
Editor’s Choice

Utopia Home Plant Pots Indoor with Drainage Holes – Set of 5 White Pla…

Make Good PlantPod Luxe – Self-Watering Wall Planters (Set of 6) – Easy …
Ahopegarden Indoor Garden Hydroponics Growing System: 10 Pods Plant Germ…
FAQs
What if I don’t have enough sunlight? Consider using shade-tolerant plants or a grow light to supplement.
How long should I wait to water after planting? Water immediately after planting, then check the soil moisture every few days.
Is it safe to use pesticides? If necessary, opt for organic or natural options to minimize harm to beneficial insects.
FAQs
Editor’s Choice
XLUX Long Probe Deep Use Soil Moisture Meter, Water Monitor Indicator Se…

GooingTop LED Grow Light,6000K Full Spectrum Clip Plant Growing Lamp wit…
Conclusion
Congratulations on setting up your minimalist balcony garden! You’ve transformed your small space into a beautiful oasis. Now that you’ve completed this project, consider expanding your garden or adding new plants in the future. Your balcony is a reflection of your style and can be a peaceful escape from daily life.
Feel free to explore gardening resources or join local gardening groups to continue your journey. Remember, every small step contributes to a larger goal of creating a sustainable and enjoyable living environment. Happy gardening!