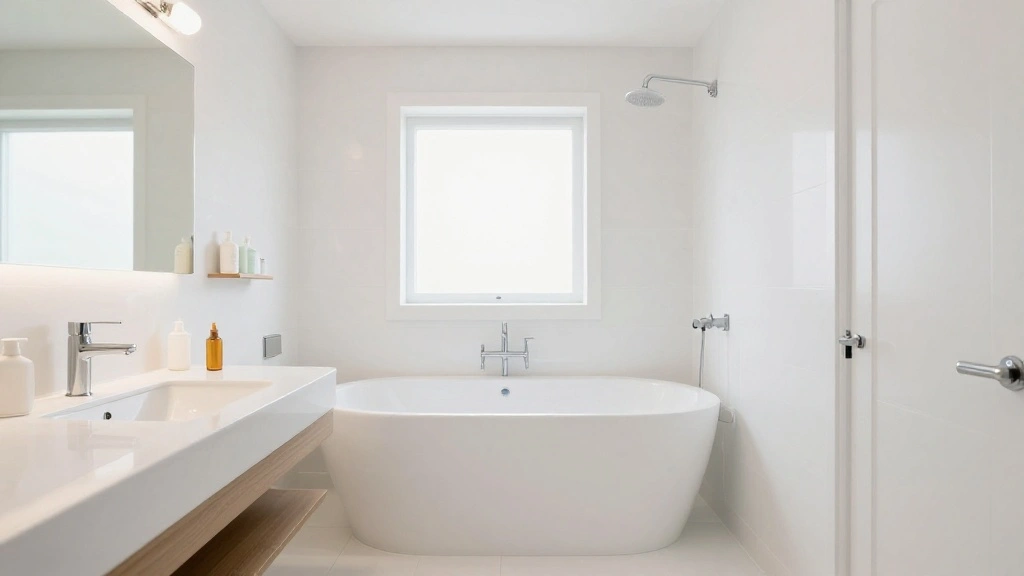
Is your bathroom cluttered with products you rarely use, making it feel cramped and disorganized? You’re not alone! A cluttered bathroom can create stress and make your morning routine feel overwhelming. It’s time to take action and reclaim your space. In just one hour, you can transform your bathroom into a minimalist oasis that not only looks great but also makes your daily routine smoother.
In this guide, you’ll learn how to efficiently declutter your bathroom by focusing on essential items and creating a serene environment. You’ll discover practical steps to identify what to keep, what to discard, and how to organize what remains. Each step is designed for beginners, ensuring that anyone can follow along and achieve results.
Get ready to roll up your sleeves and dive in, because by the end of this hour, you will have a cleaner, more organized bathroom that reflects a minimalist lifestyle.
TL;DR Summary
- Dedicate one hour to declutter your bathroom.
- Follow eight simple steps to streamline your space.
- Learn to keep only essential items for a cleaner, minimalist look.
- Enjoy a more organized and stress-free bathroom experience!
TL;DR Summary
Editor’s Choice

Vtopmart 25 PCS Clear Plastic Drawer Organizers Set, 4-Size Versatile Ba…

SPACELEAD Slim Storage Cart 4 Tier,Bathroom Organizer Rolling Utility,Mo…

Ceramic Bathroom Accessories Set 4 Pcs – Modern Scandinavian Neutral B…
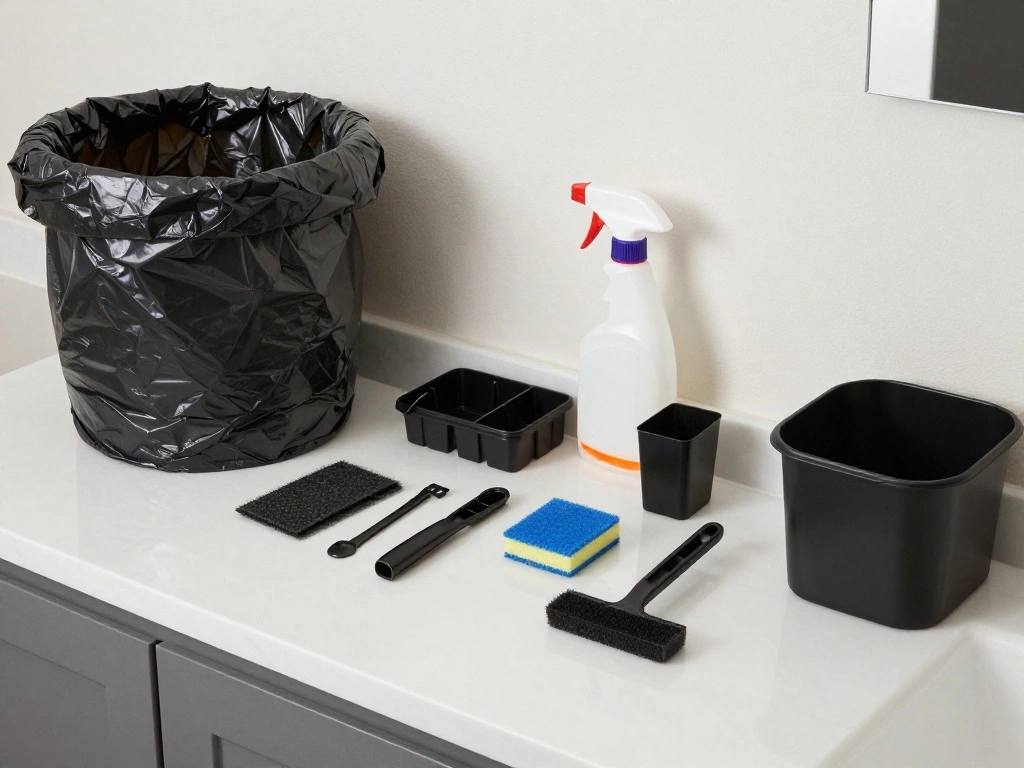
Prerequisites/Materials Needed
- Trash bags: 2-3 for discarding items.
- Donation box: 1 for items in good condition.
- Cleaning supplies: 1 set (all-purpose cleaner, cloths).
- Organizers: 2-3 small bins or baskets for storage.
Prerequisites/Materials Needed
Editor’s Choice

Small Trash Bags 4-6 Gallon, Inwaysin 200 Count Biodegradable Trash Bags…

Method All-Purpose Cleaner Spray, Lime + Sea Salt, Perfect for Most Coun…

3 Pack Small Plastic Basket, Storage Bin Baskets for Organizing, Pantry …
Skill Level & Time Estimate
Skill Level: beginner
Total time estimate: 1 hour
Breakdown: 5 minutes for preparation, 45 minutes for decluttering, 10 minutes for cleaning and organizing.
Skill Level & Time Estimate
Editor’s Choice

Scrubbing Bubbles Easy Clean Foaming Bleach-Free Bathroom All Purpose Cl…
Step 1: Gather Your Supplies
Start by collecting all the materials you need to declutter your bathroom. This includes trash bags, a donation box, cleaning supplies, and organizers. Having everything in one place will save you time and make the process smoother.
- Grab 2-3 trash bags for items you will discard.
- Find a box for items you want to donate.
- Gather all-purpose cleaner and cloths for cleaning surfaces.
- Collect 2-3 bins or baskets to organize what you keep.
Pro Tip: Having your supplies ready will help you stay focused and minimize distractions during the decluttering process.
Why this matters: Being organized from the start sets the tone for a successful decluttering session. It reduces the likelihood of getting sidetracked.
Time estimate: 5 minutes.
Step 1: Gather Your Supplies
Editor’s Choice

Method All-Purpose Cleaner, Pink Grapefruit, Perfect for Most Counters, …

360° Rotating Makeup Organizer, Upgraded 3 Tier Skincare Perfume Organi…
Step 2: Clear the Counters
Begin your decluttering by removing all items from your bathroom counters. This includes toiletries, makeup, and any other products. Take everything off so you can assess what is truly necessary.
- Take a deep breath and start at one end of the counter.
- Remove all items, placing them in a pile on the floor.
- Wipe down the counter with your cleaning supplies.
Warning: Be cautious of sharp objects like razors or scissors while clearing items.
Why this matters: Clearing the counters allows you to see the space you have and helps in making decisions about what to keep.
Time estimate: 10 minutes.
Step 2: Clear the Counters
Editor’s Choice

NISHEL Travel Toiletry Bag for women, Portable Hanging Organizer for Tra…

Feminine Wipes for Women – Flushable pH Balanced Wipes, 99% Water & Al…
360° Rotating Makeup Organizer, Upgraded 3 Tier Skincare Perfume Organi…
Step 3: Sort Items into Categories

With all your items on the floor, it’s time to categorize them. Group products by type, such as skin care, hair care, makeup, and oral hygiene. This will help you evaluate what you really need.
- Take your pile of items and separate them into categories.
- Make a stack for each category, ensuring you can see everything.
- As you categorize, consider whether each item is necessary.
Pro Tip: Use a small bin for each category to keep things organized as you sort.
Why this matters: Categorizing helps you visualize what you own and makes it easier to decide what to keep or discard.
Time estimate: 10 minutes.
Step 3: Sort Items into Categories
Editor’s Choice

4Pcs Skincare Stuff Canvas Makeup Bags, 9.06 x 5.9inch Cosmetic Bags wit…

HBlife Makeup Organizer for Vanity with Brush Holder, Large Bathroom Cou…
Step 4: Evaluate What to Keep

Now that your items are sorted, it’s time to evaluate what you need. Look at each category and decide which items you use regularly and which are just taking up space.
- For each category, review items one by one.
- Ask yourself if you use it at least once a month.
- Set aside items that you haven’t used in the last year for disposal or donation.
Warning: Be honest with yourself about what you truly need; it’s easy to hold onto items for sentimental reasons.
Why this matters: Keeping only what you use regularly will reduce clutter and make your bathroom feel more open.
Time estimate: 15 minutes.
Step 4: Evaluate What to Keep
Editor’s Choice

Green Piece® Cleaner – (Made in USA) The All Natural Earth Friendly Cle…

15 Piece Set Women’s Travel & Hygiene Kit with Clear Toiletry Bag, Per…

NISHEL Travel Toiletry Bag for women, Portable Hanging Organizer for Ful…
Step 5: Dispose and Donate
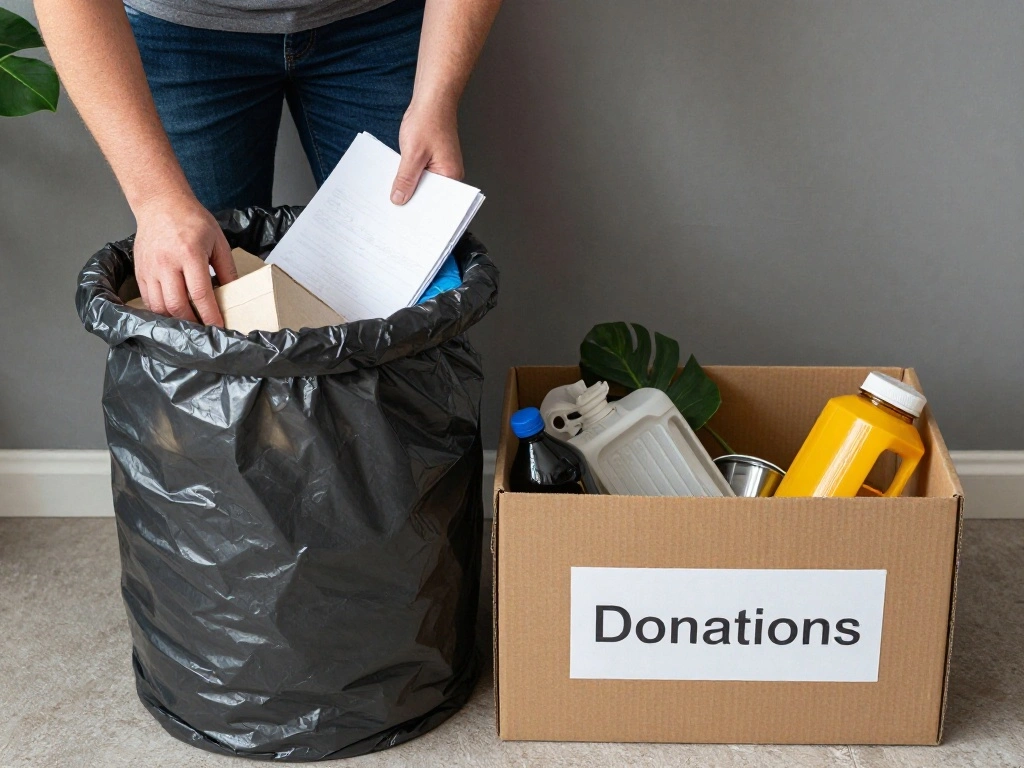
With your evaluation complete, it’s time to take action on the items you’ve decided to part with. This includes throwing away expired products and donating items in good condition.
- Take your trash bags and remove all expired products.
- Put any items in good condition into your donation box.
- Consider where you will donate (local shelters, charities, etc.).
Pro Tip: Research local organizations that accept donations to ensure your items go to good use.
Why this matters: Disposing of unwanted items clears physical space and contributes to a more organized bathroom.
Time estimate: 10 minutes.
Step 5: Dispose and Donate
Editor’s Choice

Vtopmart 4 Pack Bathroom Organizer, 2 Tier Clear Under Sink Organizers V…
Step 6: Clean Surfaces
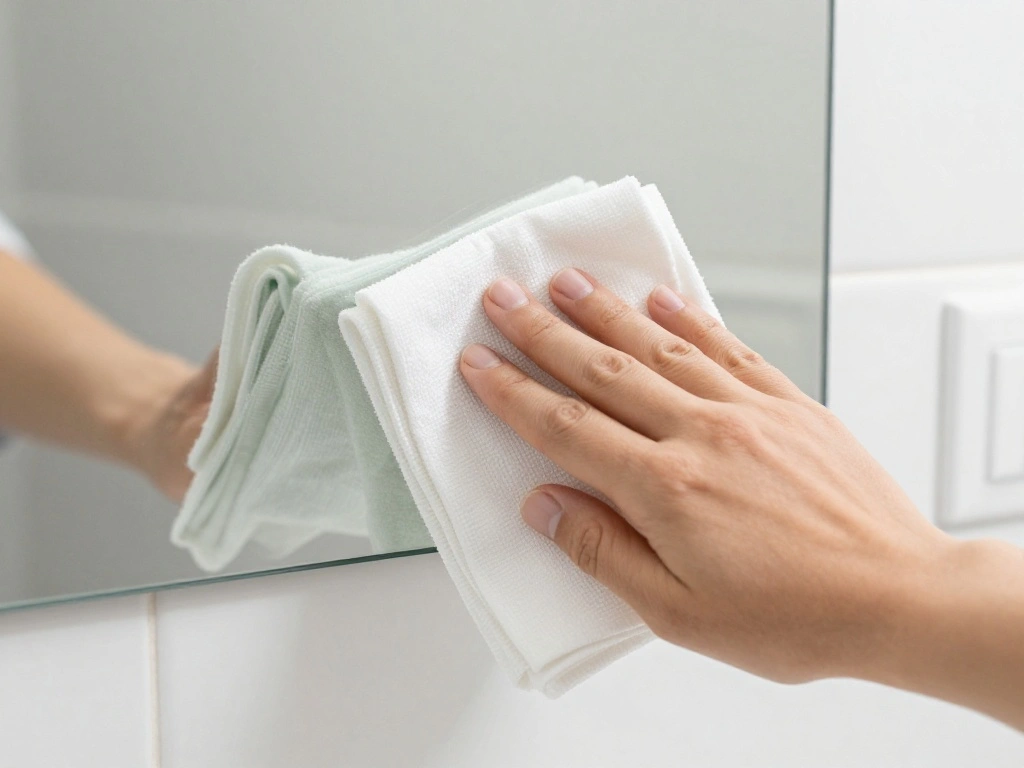
After decluttering, clean all surfaces in your bathroom. This includes counters, mirrors, and any shelves. A clean environment enhances the minimalist look you’re going for.
- Spray your all-purpose cleaner on counters and mirrors.
- Use a cloth to wipe down all surfaces, starting from the top and working down.
- Don’t forget to clean your sink and faucet fixtures.
Pro Tip: Use microfiber cloths for a streak-free shine on mirrors.
Why this matters: Cleaning surfaces after decluttering ensures that the space feels fresh and inviting.
Time estimate: 10 minutes.
Step 6: Clean Surfaces
Editor’s Choice

HOMEXCEL Microfiber Cleaning Cloth 210GSM, Pack of 12, Size:11.5″ x 11.5…

Sprayway Glass Cleaner Foaming Aerosol Spray, 19oz, Pack of 2 | Ammonia-…

ATTITUDE All Purpose Cleaner Spray, EWG Verified, Vegan, Made with 94% P…
Step 7: Organize What You Keep
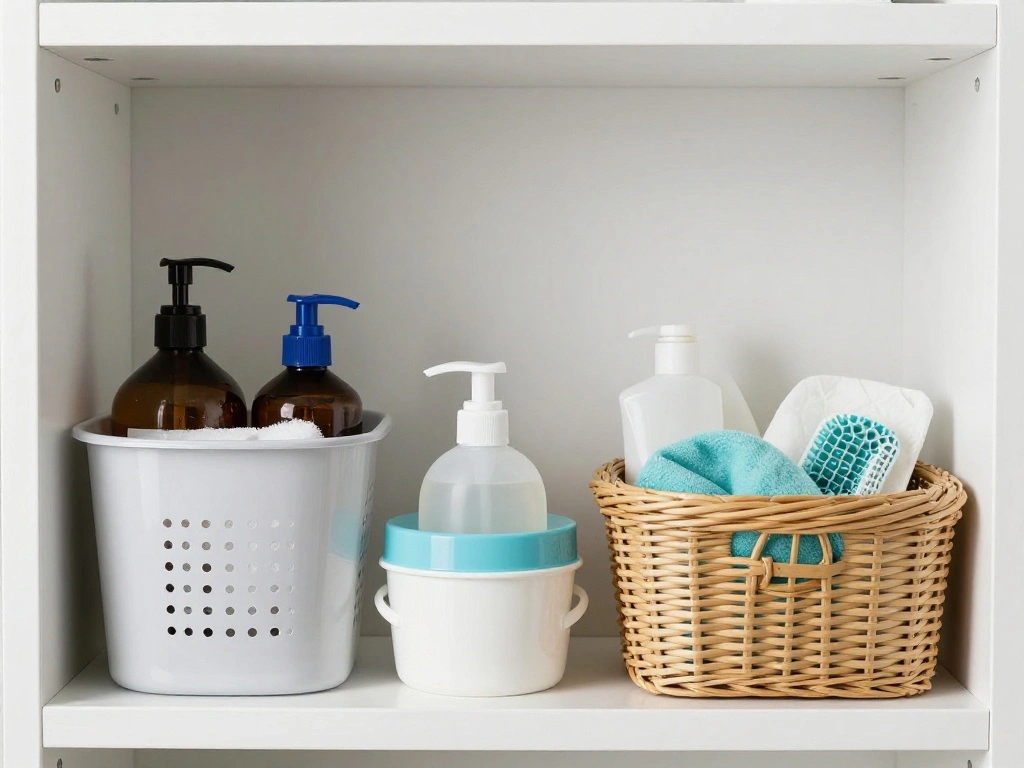
With everything cleaned, organize the items you’ve decided to keep. Use your bins or baskets to store products neatly and make your bathroom look tidy.
- Place frequently used items within easy reach.
- Store less frequently used items in bins or baskets.
- Label bins if necessary to maintain organization.
Pro Tip: Use clear bins to easily see contents without opening them.
Why this matters: Organizing your kept items ensures your bathroom remains clutter-free and easy to navigate.
Time estimate: 10 minutes.
Step 7: Organize What You Keep
Editor’s Choice

Nelko Label Maker Machine with Tape, P21 Bluetooth Label Printer, Wirele…

Vtopmart 2 Pack Small Clear Stackable Storage Drawers,Acrylic Bathroom M…

CubesLand Paper Rope Scalloped Edge Toilet Paper Storage Basket, Small L…
Step 8: Maintain Your Minimalist Bathroom
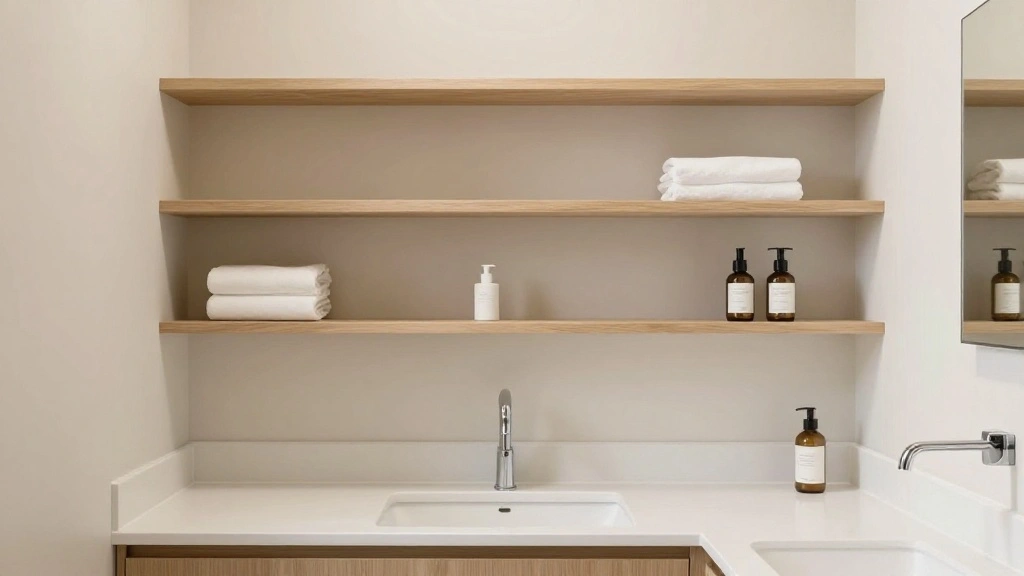
Congratulations on your decluttering journey! To keep your bathroom looking minimalist, establish a maintenance routine. Regularly assess your items to prevent clutter from building up again.
- Set a reminder to declutter every 3-6 months.
- Always evaluate new products before bringing them home.
- Practice the one-in, one-out rule: for every new item, remove an old one.
Pro Tip: Create a checklist for regular maintenance to stay on track.
Why this matters: Establishing a routine ensures your minimalist bathroom remains a peaceful and organized space.
Time estimate: 5 minutes.
Step 8: Maintain Your Minimalist Bathroom
Editor’s Choice

BGYMF 4-Tier Slim Bathroom Storage Cabinet, Slim Cabinet for Bathroom,Na…

BAYKA Bathroom Floating Shelves for Wall Set of 3 – Rustic Brown Farmhou…
Pro Tips
- Set a Timer: Keep track of your one-hour limit to stay focused and motivated.
- Use Multi-Functional Products: Choose items that serve multiple purposes to save space.
- Limit Decorative Items: Keep decorations to a minimum to maintain a clean look.
- Regularly Review Your Collection: Make decluttering a habit to avoid future build-up.
- Embrace Travel Sizes: Use travel-sized products for daily use to minimize clutter.
Pro Tips
Editor’s Choice

10pcs Small Travel Containers, Black Sample Jars with Screw Lids, 5 Size…

Bathroom Counter Organizer and Storage, 7 Slots Detachable Toothbrush Ho…

zoocatia Small Wood Tray Pedestal Stand Farmhouse Bathroom Decor Decorat…
Common Mistakes to Avoid
Warning: Don’t hold onto expired products. They take up space and can be harmful. Discard them immediately.
Warning: Avoid keeping items for sentimental value if you don’t use them. This will lead to unnecessary clutter. Let them go.
Warning: Don’t forget to clean surfaces after decluttering. A clean space feels more organized and inviting.
Warning: Don’t rush through the evaluation process. Take your time to decide what to keep.Warning: Avoid buying new storage solutions before decluttering. You may not need them after you lighten your load.
Common Mistakes to Avoid
Editor’s Choice

17pcs Car Cleaning Kit, Pink Car Interior Detailing Kit with High Power …
360° Rotating Makeup Organizer, Upgraded 3 Tier Skincare Perfume Organi…

Women’s Sanitary Napkin Receptacle (Bin + 150 Hygiene Bags) Feminine Pad…
Troubleshooting Section
Problem: I feel overwhelmed by the amount of stuff.
Solution: Focus on one category at a time to make the task manageable.
Problem: I can’t decide what to keep.
Solution: Use the one-year rule: if you haven’t used it in a year, consider letting it go.
Problem: I have sentimental items.
Solution: Take a photo of sentimental items instead of keeping them to preserve memories without physical clutter.
Problem: I run out of time.
Solution: Prioritize the most cluttered areas first and set a timer to keep you on track.
Problem: I bought new items after decluttering.
Solution: Practice the one-in, one-out rule to maintain your minimalist space.
Troubleshooting Section
Editor’s Choice
NISHEL Travel Toiletry Bag for women, Portable Hanging Organizer for Ful…

Gifts for Women Skin Care Set, 11 Pcs Skincare Kit For Women Gift Comple…

DRASTAR Tampon Holder for Bathroom, Feminine Product Organizer, Pad Orga…
Variations/Alternative Methods
If you find the one-hour method too rushed, consider spreading the task over a weekend. This allows for more thorough evaluation and cleaning without the pressure of time constraints.
Alternatively, you can focus on one specific area at a time, such as cabinets or drawers, allowing for a detailed approach that might yield better results.
Each method has its pros and cons: the one-hour method is quick and efficient, while the weekend approach allows for deeper decision-making.
Variations/Alternative Methods
Editor’s Choice

Lifewit Drawer Dividers for Clothes, 3.2″ High 10.5″-16.5″ Expandable Dr…

Brother P-Touch PTD220 Home/Office Everyday Label Maker | Prints TZe Lab…

Tiawudi Portable Shower Caddy, Caddy Organizer with Handle, Plastic Show…
FAQs
What if I don’t have enough storage space? Consider decluttering further or using vertical space with shelves.
How long should I maintain my bathroom? A quick weekly check can help keep your space organized.
Is it safe to use expired products? No, expired products can cause skin irritations or infections; always discard them.
What if I have too many duplicates? Keep only what you regularly use; donate or discard the rest.
Can I involve my family in the process? Yes! Make it a family activity to promote teamwork and shared responsibility.
FAQs
Editor’s Choice

SONGMICS 6 LEDs Mirror Jewelry Cabinet, 47.2-Inch Tall Lockable Wall or …

DECRAFTS Seagrass Storage Basket with Lid Rectangular Small Woven Shelf …

Habit tracker for women: 30-Day Fitness & Wellness Journal with Daily Wo…
Conclusion

Congratulations! You’ve successfully decluttered your bathroom in just one hour. Look around and admire your clean, organized space. This accomplishment not only improves the aesthetics of your bathroom but also contributes to a more peaceful daily routine.
As you move forward, remember to maintain this newfound organization. Schedule regular decluttering sessions and stay mindful of what you bring into your space. For more tips on minimalism and organization, consider exploring additional resources.
Celebrate this achievement and feel proud of the effort you’ve made toward a more minimalist lifestyle!