
Creating a minimalist gallery wall can be a daunting task, especially when trying to mix different art sizes without it looking chaotic. Many people shy away from this challenge, fearing that their walls will become cluttered or unbalanced. If you feel overwhelmed by the thought of arranging multiple pieces together, you’re not alone.
In this guide, you will learn how to effectively mix various art sizes to create a stunning gallery wall that expresses your unique style while maintaining a minimalist aesthetic. By the end of this process, you’ll feel confident in your ability to curate art that complements each other without overwhelming the space.
You will specifically learn how to select pieces, plan your layout, and install the artworks to achieve a cohesive and stylish look—all while keeping it minimalist. This project is marked as intermediate in difficulty and will take approximately 2-3 hours to complete.
If you’re ready to transform your wall into a work of art, keep reading!
TL;DR Summary
- Learn to mix different art sizes for a minimalist gallery wall.
- Step-by-step instructions ensure a cohesive look.
- Pro tips and common mistakes help streamline the process.
- Celebrate your completed gallery wall with confidence!
TL;DR Summary
Editor’s Choice

3-in-1 Picture Hanging Tool, All-in-One Art Hanging Kit with Leveling, P…

Go Hang It! Pro, All-in-One Picture Hanging Kit – Picture Leveling and H…

Vittanly 20 Pack Picture Frames Collage Wall Decor, Multi Sizes Includin…
Prerequisites/Materials Needed
- Art pieces of various sizes (at least 3-5)
- Measuring tape
- Pencil for marking
- Level for alignment
- Nail or adhesive hooks (depending on wall type)
- Hammer or drill (if using nails)
- Optional: Gallery wall templates (paper cutouts of art sizes)
Prerequisites/Materials Needed
Editor’s Choice


Huepar Laser Level 360 Self Leveling, Rechargeable Green Laser 3×360° C…

GDMINLO Soft Tape Measure Double Scale Body Sewing Flexible Tailor Craft…
Skill Level & Time Estimate
Skill Level: intermediate
Total time estimate: 2-3 hours
Breakdown:
- Selecting Art: 30 minutes
- Planning Layout: 1 hour
- Installation: 1-1.5 hours
Skill Level & Time Estimate
Editor’s Choice
3-in-1 Picture Hanging Tool, All-in-One Art Hanging Kit with Leveling, P…

KURUI 303Pcs Picture Hanging Kit, Picture Hangers Assorted Kit with Heav…

Camden Reed Arcadia Gallery Wall Frame Set, 16×20 and 16×16 Inch Matted …
Step 1: Select Your Art Pieces
Begin by gathering your art pieces. Choose a variety of sizes and styles that reflect your personality while adhering to a minimalist aesthetic. Follow these sub-steps:
- Browse your collection or shop for new pieces.
- Consider a cohesive color palette to unify the pieces.
- Limit your selection to 3-5 pieces to prevent overcrowding.
Pro Tip: Choose pieces that evoke different emotions or themes to create a dynamic visual interest.
Why this matters: The right selection sets the foundation for a successful gallery wall. A thoughtfully curated collection enhances the overall look and feel of your space.
Time estimate for completing this step: 30 minutes.
Step 1: Select Your Art Pieces
Editor’s Choice

Color Chart & Palette Book for Artist & Hobbyist: A Hands-On Workbook to…

203-Piece Metal Picture Hanging Kit in Tackle Box, Hangs 14 Wooden Frame…

Dynamic Frames Li’l Davinci Art Cabinet, Stores up to 50 Pieces of 8.5…
Step 2: Plan Your Layout
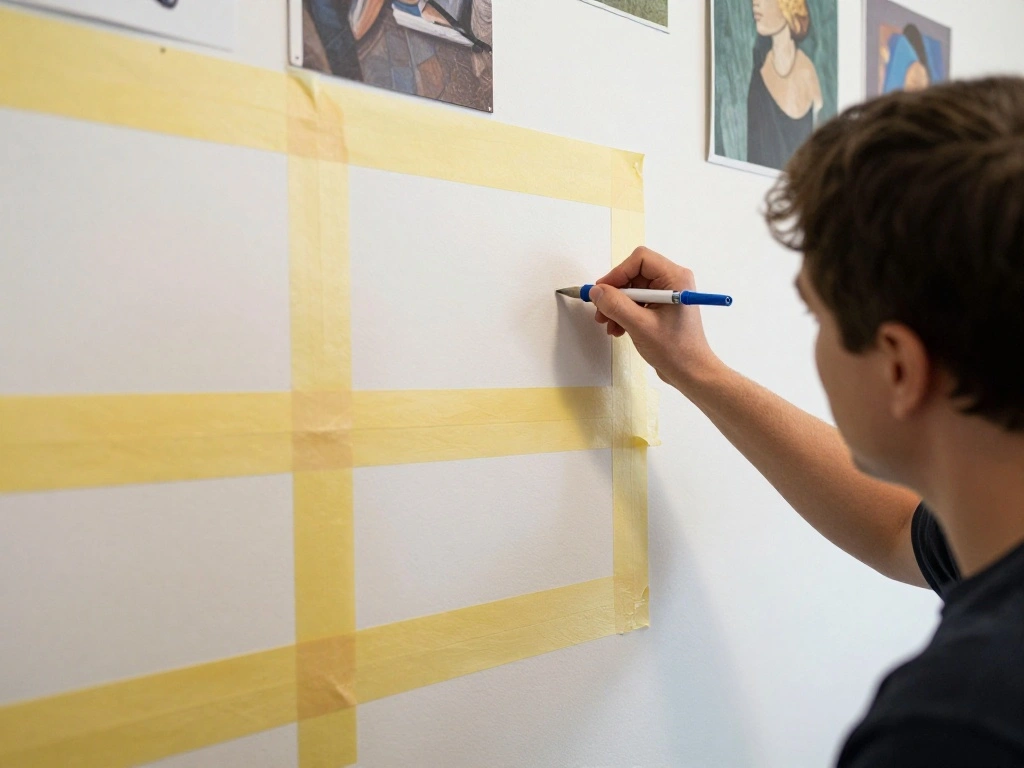
Next, it’s time to plan how the art will be arranged on your wall. This step involves visualizing the layout before hanging anything. Follow these steps:
- Use painter’s tape to outline the dimensions of each art piece on the wall.
- Experiment with different arrangements to find what feels balanced.
- Consider the eye level—art should be centered around 57-60 inches from the floor.
Warning: Avoid placing pieces too high or low, as this can disrupt visual harmony.
Why this matters: A well-planned layout ensures that each piece is displayed effectively and creates a cohesive look without overwhelming the viewer.
Time estimate for completing this step: 1 hour.
Step 2: Plan Your Layout
Editor’s Choice


Venusmiles 15 Pack Picture Frames Collage Wall Decor, Gallery Frame Set …
Step 3: Prepare Your Wall
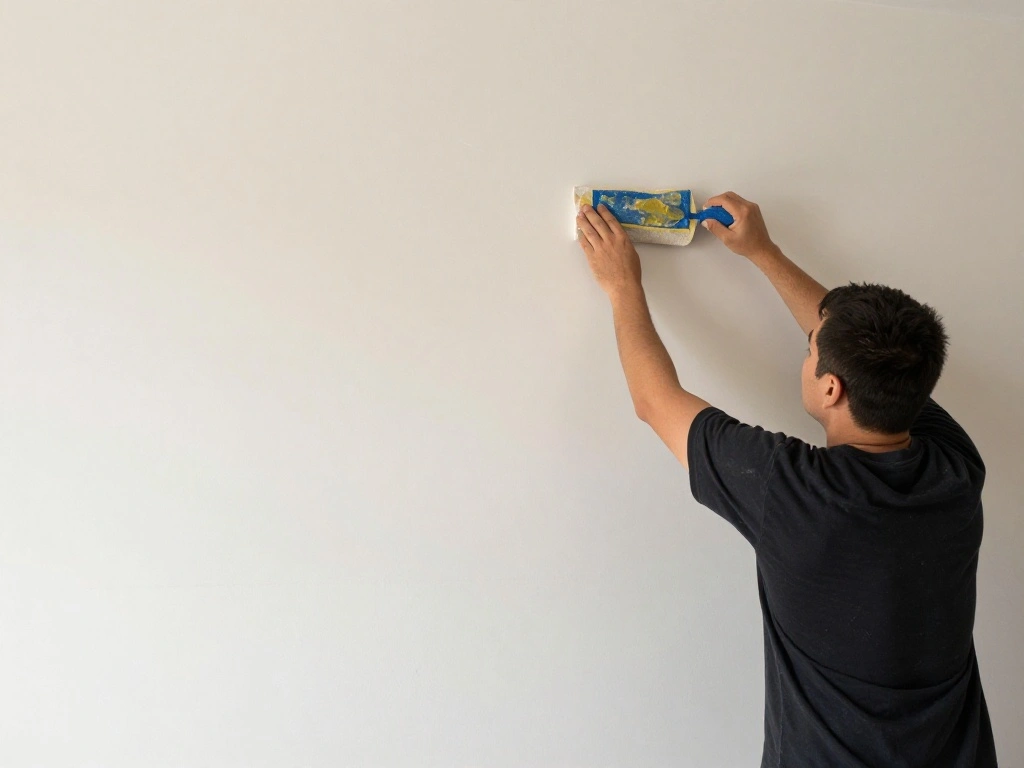
Before hanging your art, prepare the wall to ensure a smooth installation. Here’s how to do it:
- Clean the wall with a damp cloth to remove dust and debris.
- Ensure the wall surface is dry and free from any residue.
- If necessary, patch any holes or imperfections to create a flawless backdrop.
Pro Tip: Use a level to ensure that any hooks or nails are positioned accurately.
Why this matters: A clean and prepared wall creates a professional look and allows the art to shine without distraction.
Time estimate for completing this step: 30 minutes.
Step 3: Prepare Your Wall
Editor’s Choice

Torpedo Level Magnetic, Firecore 9 Inch Shockproof Small Leveler Tool wi…

Fabuloso Microfiber Cleaning Cloths for Home & Car, Lint-Free Scratch-Fr…

Drywall Repair Kit Drywall Hole Repair Patch Kits Wall Spackle Repair Pa…
Step 4: Hang Your Art
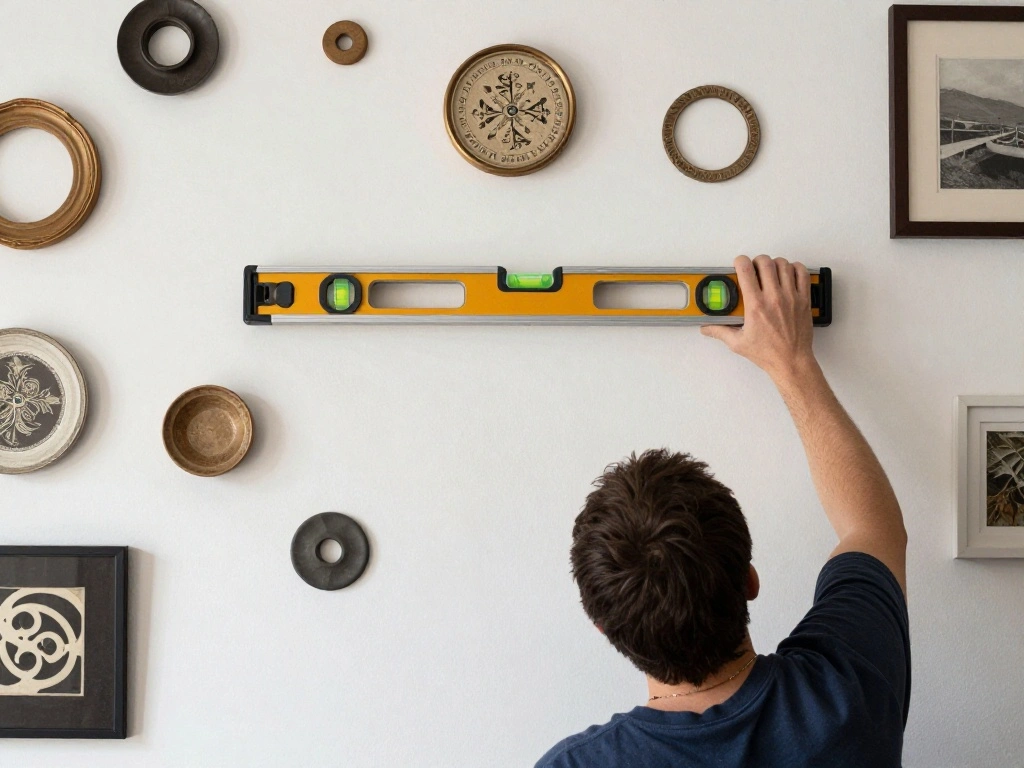
Now comes the exciting part—hanging your selected art! Follow these steps for a successful installation:
- Starting from the center piece, measure and mark the wall where it will hang.
- Install the appropriate hook or nail based on the weight of the art.
- Hang the piece and use a level to ensure it is straight.
- Repeat for each additional piece, adjusting as necessary based on your layout.
Warning: Ensure your hooks can support the weight of your art to prevent any falls.
Why this matters: Correct installation is crucial to maintaining the integrity of your gallery wall. Improperly hung pieces can lead to damages and disrupt the overall aesthetic.
Time estimate for completing this step: 1-1.5 hours.
Step 4: Hang Your Art
Editor’s Choice

184 Pieces Picture Hanging Kit, 20lb, 30lb, and 50lb Picture Hangers, Me…

PREXISO Multi Surface Laser Level LED Light Vial, 30Ft Horizontal & Vert…

Creating Your Picture Book Dummy: A Layout Guide for 32, 40, & 48 Page P…
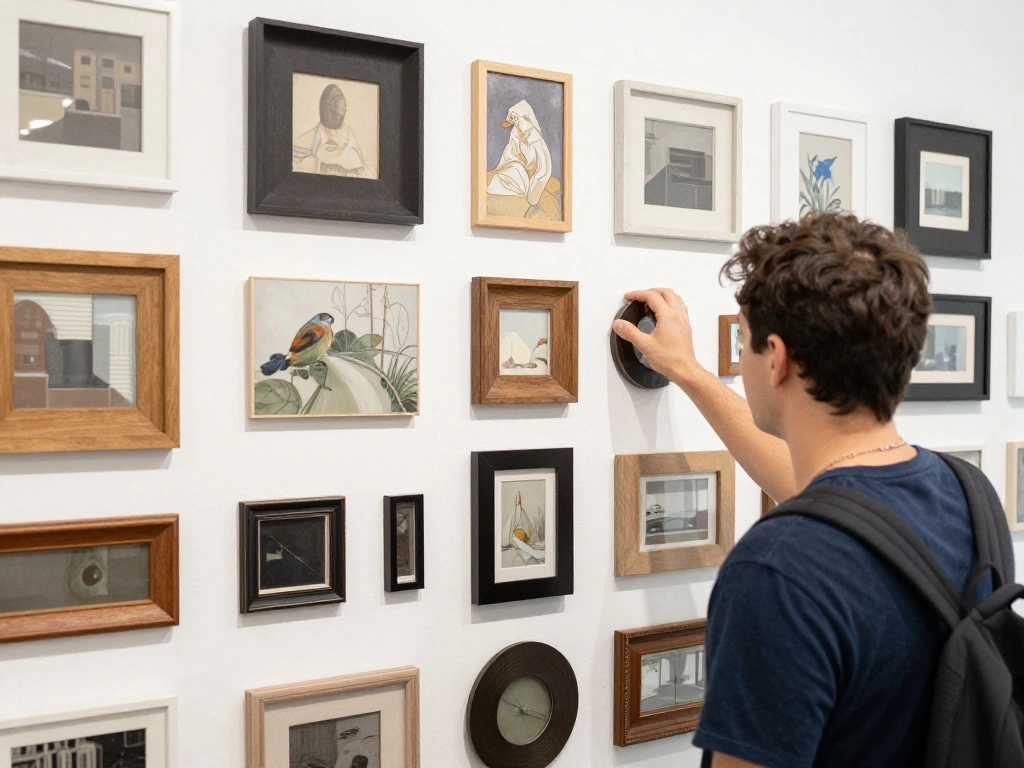
Step 5: Step Back and Assess

Once all your art is hung, step back and assess the overall look of your gallery wall. Here’s what to do:
- Take a moment to view the wall from different angles.
- Check for any adjustments needed for spacing or alignment.
- Consider the overall flow and balance of the pieces.
Pro Tip: Invite a friend to provide feedback—fresh eyes can help identify areas for improvement!
Why this matters: Assessing your work ensures that the final result meets your vision and maintains the minimalist aesthetic you aimed for.
Time estimate for completing this step: 30 minutes.
Step 5: Step Back and Assess
Editor’s Choice

Command 15 lb Large Picture Hanging Strips 14 Pairs (28 Strips), Damage-…

8Pcs Small Bubble Spirit Level Mini Square Levels Measuring Tools for Ba…
Step 6: Enjoy Your Gallery Wall
Your gallery wall is complete! Now it’s time to enjoy the fruits of your labor. Consider these final touches:
- Take a few photos to celebrate your accomplishment.
- Invite friends or family to view your new space.
- Regularly update the wall with seasonal art or new pieces as desired.
Pro Tip: Use LED spotlights to highlight your art and create a stunning visual effect.
Why this matters: Enjoying your gallery wall reinforces the effort you put into creating it and allows you to showcase your style and creativity over time.
Time estimate for completing this step: 15 minutes.
Step 6: Enjoy Your Gallery Wall
Editor’s Choice

kadision LED Wall Pack Light 120W 100W 80W Adjustable, 3000K 4000K 5000K…

125 Pcs Heavy Duty Picture Hanging Kit With Nails for Wooden/Drywall – P…
Pro Tips
- Mix Textures: Combine framed art with canvases and wall sculptures for visual interest.
- Use a Color Palette: Stick to a consistent color scheme to create harmony across different pieces.
- Try Symmetry: Balance larger pieces with smaller ones on either side to create a cohesive look.
- Seasonal Changes: Change out art pieces seasonally to keep the display fresh and engaging.
- Personal Touch: Incorporate personal photographs or mementos to add character to your gallery wall.
Pro Tips
Editor’s Choice
Vittanly 20 Pack Picture Frames Collage Wall Decor, Multi Sizes Includin…

Abstract Black Metal Wall Art Set of 4, Large Modern Geometric Wall Deco…

Eonzeun 32×32 Inch Large Hand Painted Egret Oil Painting, Framed Canvas …
Common Mistakes to Avoid
Warning: Hanging pieces too close together can create a chaotic look. Always maintain a consistent spacing of 2-4 inches between art.
Warning: Using the wrong hanging hardware can lead to damage. Ensure your hooks or nails are rated for the weight of your art.
Warning: Ignoring the eye level can result in awkward placements. Center pieces around 57-60 inches from the floor for optimal viewing.
Common Mistakes to Avoid
Editor’s Choice
Command 15 lb Large Picture Hanging Strips 14 Pairs (28 Strips), Damage-…

Mibote Baby Growth Height Chart Handing Ruler Wall Decor for Kids, Canva…

Blulu 10 Pcs Adjustable Picture Hangers J Hooks Mirror Hanging Kit with …
Troubleshooting Section
Problem: Art pieces look unbalanced.
Solution: Adjust spacing between pieces to create a more even look.
Problem: Artwork falls off the wall.
Solution: Ensure the correct hardware is used and re-evaluate the weight capacity of your hooks.
Problem: The wall feels cluttered.
Solution: Remove one or two pieces to simplify the display and maintain a minimalist aesthetic.
Troubleshooting Section
Editor’s Choice

Hillman 122388 Adjustable Picture Hanger 100lbs Set of 2
Command 15 lb Large Picture Hanging Strips 14 Pairs (28 Strips), Damage-…
Variations/Alternative Methods
Consider these alternative approaches for your gallery wall:
- Grid Layout: Align pieces in a strict grid for a more modern look. Best for those who prefer order over spontaneity.
- Salon Style: Hang art in a more free-form style, allowing for varied spacing and arrangement. This method works well with eclectic collections.
Choose the method that best suits your personal style and the overall feel of the space.
Variations/Alternative Methods
Editor’s Choice
KURUI 303Pcs Picture Hanging Kit, Picture Hangers Assorted Kit with Heav…

Level Ruler Picture Hanging Tool, All-in-One Wall Art Hanger with Built-…

Giftgarden 14 Pack Black Picture Frames Set, 2pcs 11×14 Matted for 8×10,…
FAQs
- What if I don’t have enough art pieces? Consider adding mirrors or decorative items to fill gaps while maintaining a minimalist feel.
- How long should I wait to change the art? Regularly update your gallery wall every few months to keep it fresh and interesting.
- Is it safe to use adhesive hooks? Yes, as long as they are rated for the weight of your art and applied correctly.
FAQs
Editor’s Choice

Parma77 Feng Shui Natural Rose Pink Quartz Crystal Money Tree, Healing C…

Adhesive Hooks Heavy Duty, Long Stainless Steel Self Adhesive Wall Hook,…

Antique White Plastic Arched Makeup Mirror, Standing, Hanging or Wall Mo…
Conclusion
Congratulations on completing your gallery wall! You have successfully mixed art sizes to create a stunning minimalist display that reflects your unique style. Remember, the key to a successful gallery wall is not just in the pieces you choose, but in how you arrange and present them.
As you move forward, consider experimenting with new art pieces or seasonal updates to keep your wall feeling fresh. Enjoy showcasing your creative side and inspiring others with your beautiful space!